When it comes to trailer homes, understanding stud spacing is crucial for safe and effective renovations or repairs. Typically ranging from 16 to 24 inches apart, stud spacing plays a vital role in maintaining the structural integrity and insulation of your home. For those looking to personalize their space, whether through adding shelves or upgrading insulation, knowing the stud layout is key to achieving desired results without compromising safety. As you consider updates, take a moment to delve deeper into the specifics of stud spacing; this knowledge not only empowers you as a homeowner but ensures your living environment is as functional and comfortable as possible. Let’s explore the essential details you need to navigate your trailer home construction effectively.
What Is Stud Spacing in Trailer Homes?
Understanding the intricacies of stud spacing in trailer homes is essential for ensuring structural integrity and making informed renovation decisions. Studs are vertical framing members that provide support and structure. In trailer homes, stud spacing typically varies, with most standard configurations being either 16 or 24 inches apart. This spacing not only impacts the strength of the walls but also determines how fixtures and wall coverings can be installed. When altering or repairing the frame, it’s crucial to maintain or replicate the original stud spacing to preserve the home’s stability.
When planning any renovations, knowing the standard stud spacing can guide homeowners in their projects. For example, if you intend to add shelving or cabinetry, understanding where the studs are located helps secure these items properly, preventing damage to the walls and ensuring safety. Furthermore, if you’re considering insulation upgrades or electrical work, being aware of the layout of the studs becomes even more significant.
Several factors can influence the stud spacing in a trailer home. These include the design and manufacturer specifications, the age of the home, and local building codes. Older trailer homes may feature different stud configurations, so always check the specifications or consult with a professional before proceeding with any structural modifications. With the right knowledge and tools, you can effectively work with the existing frameworks to enhance your trailer home’s livability and longevity.
Understanding Stud Types and Materials
When it comes to the structural integrity of trailer homes, the materials and types of studs used play a pivotal role. Trailer homes typically utilize wood or metal studs, each offering distinct advantages and characteristics depending on the specific needs of the living space. Understanding these materials helps homeowners make informed decisions, especially during renovations or repairs.
Wood Studs are the most common choice in trailer homes due to their affordability and ease of use. Standard dimensional lumber, such as 2x4s, is often used for framing. These studs are favored for their insulating properties and ease of cutting and fastening. One of the key considerations when using wood is its susceptibility to moisture and pests, which can compromise structural integrity over time. To mitigate these risks, it’s important to treat wood with preservatives and ensure proper sealing, especially in areas exposed to the elements.
Metal Studs, on the other hand, are increasingly being utilized in modern trailer homes due to their durability and resistance to pests and rot. They are lighter than wood and can be easier to handle during construction. However, metal studs conduct heat more than wood, which can impact insulation needs. When using metal, it’s essential to pair them with appropriate insulation techniques to maintain energy efficiency within the home.
Another important factor in stud selection is the spacing between the studs. Commonly, trailer homes will have studs spaced either 16 or 24 inches apart, depending on the design. This spacing not only affects the overall strength of the walls but also determines where fixtures can be securely mounted. Understanding the interplay between stud type, material, and spacing is crucial for maintaining the stability and safety of your trailer home.
By selecting the right type of studs and materials and adhering to proper architectural principles, homeowners can enhance the safety and livability of their trailer homes. Whether you are renovating or maintaining, this knowledge empowers you to make the best choices for your space.
Common Stud Spacing Configurations for Trailers
Understanding stud spacing in trailer homes is crucial, as it directly influences the structural integrity and overall livability of these unique dwellings. Generally, trailer homes utilize two common stud spacing configurations: 16 inches and 24 inches on center. Knowing which spacing your trailer employs can help determine load-bearing capabilities and guide renovation projects, ensuring safety and reliability.
16-Inch On-Center Spacing
Studs spaced 16 inches apart are prevalent in many trailer homes due to their ability to provide stronger support for fixtures and wall materials. This configuration is often preferred for areas that require additional stability, such as where cabinets, shelves, or appliances will be mounted. A tighter spacing means more points of attachment, which can distribute weight more evenly and reduce the likelihood of bowing or warping over time.
24-Inch On-Center Spacing
On the flip side, 24-inch on-center stud spacing is sometimes utilized in less load-intensive areas or cost-effective builds. This configuration allows for quicker construction and uses fewer materials, thus reducing overall weight, which can be beneficial in mobile homes where weight considerations are paramount. However, this approach may result in fewer points for secure fixture attachment, necessitating careful planning and perhaps additional reinforcement for heavier installations.
Factors Influencing the Choice of Spacing
Several factors can influence the choice between these configurations, including local building codes, the home’s design, and the overall layout of the trailer. Mobile homes often need to accommodate varying climates and load requirements, which further complicates the decision. Understanding these parameters ensures that your renovations align with safety standards and maintain the home’s structural soundness.
By being informed about these common stud spacing configurations, you can approach renovations with confidence, ensuring that changes enhance your trailer home’s stability while offering a durable living environment. Whether you’re considering new wall panels, installing cabinets, or re-conceptualizing your space, this foundational knowledge is invaluable for both new and seasoned trailer home residents.
Factors Influencing Stud Spacing in Mobile Homes
The concept of stud spacing in mobile homes is pivotal for structural integrity and a safe living environment. Various factors can influence how these spaces are designed and implemented, impacting both construction and renovation efforts. One primary consideration is local building codes. Regions may have specific regulations that dictate stud spacing based on climate, seismic activity, or wind loads, which can directly affect how homes are built or modified. Homeowners should be aware of their area’s regulations to ensure compliance and safety.
Another significant influence is the home design and layout. For instance, areas designated for heavy appliances, such as kitchen ranges or washing machines, often benefit from tighter stud spacing. This is because greater support is necessary to adequately bear the weight and stress of these installations. Conversely, less critical wall sections, like those in a bedroom, may allow for wider spacing. Additionally, the style of construction-whether it’s a traditional design or a modern layout-can determine the amount of materials and labor used in building the stud framework.
External conditions play a role as well, as mobile homes often experience different stresses compared to stationary houses. For example, winds can pose a threat to the structural integrity of the walls, urging designers to implement tighter stud spacings to resist buoyancy uplift. Furthermore, maintenance considerations influence choices. Regular inspections are tedious yet vital, ensuring that any issues with the materials or spacing are addressed before they compromise the home’s safety.
Understanding these factors can empower homeowners to make informed decisions when renovating or maintaining their mobile homes, ensuring that the structures remain robust and reliable for years to come. When planning changes, consider all influences-codes, design, external conditions-and consult with a professional if uncertain, as their expertise can guide you towards the best practices for your unique situation.
How to Measure and Identify Studs
Finding studs in your trailer home is crucial, especially when planning renovations or hanging heavy items. Studs provide the structural framework that supports your walls, so knowing how to measure and identify them is essential for maintaining your home’s integrity. Most typically, trailer home studs are spaced either 16 or 24 inches apart, but a little detective work is often necessary to locate them precisely.
To begin, gather the right tools: a stud finder, a tape measure, and a pencil. A stud finder is the most efficient tool, using either magnetic or electronic methods to detect the dense material of the studs. Simply run the stud finder along the wall, and it will indicate where the studs are. Most stud finders beep or light up to signal the location. Once identified, mark the stud location lightly with a pencil for reference.
If you don’t have a stud finder, you can still locate studs manually. Start by measuring from a corner or an outlet, as outlets are typically attached to the side of a stud. Most outlets are placed about 16 inches apart vertically and are often mounted on the side of a stud. After identifying the first stud, measure 16 inches to locate the next one. Knock on the wall lightly; a hollow sound indicates a space between studs, while a more solid sound means you’ve found one.
It’s essential to keep in mind that not all trailers conform strictly to standard measurements. Some may have variations based on their design and construction, especially older models. Therefore, double-check your findings and trust your instincts-if you feel uncertain, measuring a few spots can help confirm the stud layout. By knowing how to accurately locate studs, you can ensure safer installations for shelves, cabinets, and other fixtures, enhancing both the functionality and aesthetic of your trailer home.
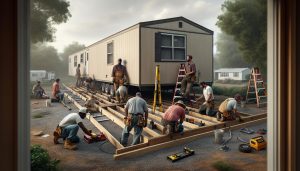
Best Practices for Stud Placement During Renovations
Renovating a trailer home can be an exciting endeavor, but understanding the best practices for stud placement is essential for maintaining a sturdy structure. Proper stud placement not only supports your walls but also ensures that any fixtures or appliances you install are securely anchored. Ideally, studs should be spaced either 16 or 24 inches apart, depending on your trailer’s design, which provides a guideline for optimal stability.
When planning your renovations, consider the following best practices:
- Assess the Load Requirements: Before installing heavy items like shelves or cabinets, evaluate the load they will impose on the studs. For heavier items, it’s advisable to attach them directly to the studs to prevent wall damage.
- Use Vertical Stud Placement: When adding or replacing studs, maintain a vertical orientation. This alignment helps ensure that any weight is distributed evenly down to the foundation, enhancing overall structural integrity.
- Maintain Consistency: If you are adding new studs in areas that will tie into existing walls, ensure that you’re consistent with the spacing and alignment used throughout your trailer. This uniformity aids in load distribution and reduces weaknesses.
- Secure Additional Support: For larger renovations, consider installing additional blocking between studs for extra support, especially when the walls will bear weight from fixtures or horizontal elements like cabinets.
It’s also crucial to take accurate measurements and mark the stud locations with a pencil prior to installation. This will allow for clear visibility while you work and help avoid any misalignment. Remember, modifications can impact the safety of your trailer home, so thorough planning and measurement will contribute significantly to your project’s success. By following these best practices, you can ensure a solid framework for all your renovation needs, enhancing your living space in this unique housing option.
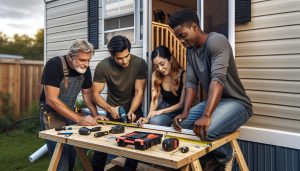
Essential Tools for Working with Trailer Home Studs
When preparing to work on the studs of your trailer home, having the right tools can make all the difference in ensuring a successful renovation. Each tool serves a specific purpose, helping you to measure, cut, install, and modify effectively. Even for novice DIY enthusiasts, gathering these essential tools will empower you to tackle stud-related projects with confidence.
First and foremost, a stud finder is crucial for locating existing studs behind your walls. This device helps accurately pinpoint where the studs are positioned, allowing you to plan your installations around them without damaging the walls unnecessarily. After finding the studs, a measuring tape will assist you in marking the exact locations for your new or replacement studs, ensuring proper spacing and alignment with the current framework.
You’ll also require a level. This tool ensures that any new studs you install are perfectly vertical, which is vital for maintaining structural integrity. For cutting and shaping the studs, a circular saw or miter saw will be effective, allowing smooth and precise cuts. Additionally, a hammer or nail gun will be necessary for fastening the studs in place once you have prepared and positioned them according to your renovation plans.
Here’s a brief overview of the essential tools you should consider:
- Stud Finder: To locate studs efficiently.
- Measuring Tape: For marking and measuring the distances accurately.
- Level: To ensure vertical alignment of studs.
- Circular or Miter Saw: For making clean cuts in the studs.
- Hammer or Nail Gun: For securing the studs in place.
Utilizing these tools not only streamlines the renovation process but also enhances the safety and stability of your trailer home. Organizing your workspace and ensuring you have all tools within reach can further improve your efficiency and effectiveness during the project. By equipping yourself with the right tools, you can ensure that your renovation efforts yield lasting results, making your living space more enjoyable and secure.
Safety Guidelines When Modifying Studs
When it comes to modifying or renovating the studs in a trailer home, safety should always be your top priority. The structural integrity of a mobile home relies significantly on its framework, making it crucial to approach any modifications with caution. Before beginning any work, familiarize yourself with the specific design and material characteristics of your trailer’s studs. For instance, many trailer homes use lightweight materials, which may require different handling compared to traditional homes.
Always wear personal protective equipment (PPE) such as goggles, gloves, and dust masks to protect against debris and sharp edges when working around studs. Ensure that your workspace is clean and free of hazards to minimize the risk of accidents. If you’re using power tools, read the manuals carefully and follow all safety guidelines to prevent injuries. Furthermore, when cutting or drilling into studs, be mindful of existing electrical wiring or plumbing that might be concealed within the walls. Use a stud finder that also detects live wires to avoid accidental damage.
It’s also essential to inspect the studs for any signs of damage, such as rot, mold, or warping before making modifications. Damaged studs can significantly affect the structural stability of your home, so consider replacing them with new, sturdy materials if necessary. Additionally, when modifying or adding new studs, maintain proper spacing according to local building codes to ensure that the structure remains secure. Consult manufacturer guidelines or local regulations to determine the appropriate stud spacing for your renovation project.
Lastly, if at any point you feel uncertain about your modifications or structural safety, don’t hesitate to consult a professional contractor. They can provide expert advice and ensure that all work is done safely and up to code, ultimately enhancing the safety and comfort of your trailer home. By approaching your modifications with care and informed consideration, you can create a living space that is not only functional but also secure for years to come.
Maintenance Tips for Trailer Home Structural Integrity
Maintaining the structural integrity of your trailer home is essential for ensuring a safe and comfortable living environment. Trailer homes often utilize lightweight materials, which can be more susceptible to wear and damage over time. Regular inspections and maintenance are key to preserving the framework and avoiding more significant repair issues down the line. Here are some vital maintenance tips to keep your trailer’s structure robust.
First and foremost, schedule regular inspections of the studs and other structural components. Look for signs of damage such as rot, mold, or warping. If you notice any structural issues, address them immediately to prevent further deterioration. For example, if you come across a warped stud, consider replacing it as soon as possible to maintain even load-bearing properties. Not only does this help with long-term structural integrity, but it also ensures your home remains safe and secure.
Another crucial aspect of maintenance is ensuring proper drainage around your trailer home. Poor drainage can lead to water pooling near the foundation, which may compromise the structural integrity over time. Keep gutters clean and ensure downspouts direct water away from the home. Additionally, consider grading the ground around your home to facilitate better drainage, reducing moisture risk near the studs.
Regularly check the insulation and vapor barriers within your walls. Inadequate insulation can lead to moisture build-up, which can cause studs to rot or develop mold. If you notice dampness or musty odors, investigate further and consider enhancing insulation or replacing damaged areas. Also, when making any modifications or renovations, ensure that any new studs follow current building codes for spacing and materials. This practice will not only comply with regulations but will also enhance the overall structural integrity of your home.
Lastly, educate yourself about signs that may indicate deeper problems within the structure. Cracks in walls, doors that don’t shut properly, or uneven floors can all be red flags signaling potential structural issues. If you encounter any of these problems, it may be wise to consult with a professional to assess and address these concerns promptly. By following these maintenance tips, you can help ensure your trailer home remains safe, sturdy, and a welcoming space for you and your family.
Common Issues Related to Stud Spacing
Stud spacing in trailer homes is a critical aspect that can significantly impact the structural integrity and overall stability of your living space. One common issue that arises from improper stud spacing is the risk of bowing or warping in the walls. This can lead to gaps that may allow moisture intrusion, which in turn can precipitate mold growth and other undesirable consequences. If your trailer home has insufficient spacing between studs, it can also lead to increased stress on the building materials during high winds or heavy snowfall, potentially resulting in severe damage.
Another prevalent issue linked to stud spacing is the difficulty in hanging or supporting fixtures, such as cabinets or shelves. Misaligned or improperly spaced studs can make it challenging to securely fasten items, leading to sagging or, worse yet, complete failure of these installations. To remedy this situation, it’s beneficial to familiarize yourself with the layout of your walls, specifically where the studs are located. Using a stud finder can make this task easier and more accurate, ensuring that your fixtures will have the support they need.
Sometimes, inconsistencies in stud spacing can also create problems during renovations. For example, if you’re adding insulation or drywall, discrepancies in the original spacing can lead to an unlevel finish or air gaps that compromise energy efficiency. It’s important to assess the existing stud configuration before embarking on any renovation project, making necessary adjustments to maintain consistency across the structure. A practical approach might include installing additional studs where needed to match standard spacing, which typically ranges from 16 to 24 inches apart.
In summary, being mindful of stud spacing can help you avoid a range of problems that could compromise your trailer home’s integrity and comfort. Regular inspections, knowledgeable fixture installations, and careful planning during renovations are all essential steps in ensuring that your home remains safe, functional, and resilient against the challenges posed by changing weather conditions and everyday wear.
Expert Tips for Enhancing Trailer Home Stability
Ensuring your trailer home maintains structural integrity and stability is essential, especially as weather conditions and wear can put your living space at risk. One of the best strategies to enhance stability is through regular inspections and adequate stud placement. Start by evaluating the existing stud spacing and condition-this can identify potential weaknesses before they become significant problems. An ideal spacing generally lies between 16 to 24 inches apart, which supports wall strength and weight distribution.
Invest in Quality Materials
When working on your studs, opt for high-quality materials that can withstand the rigors of mobile living. Using pressure-treated wood for your studs can prevent moisture issues and warping, especially in areas prone to dampness. Additionally, consider reinforcing your studs with metal brackets that provide extra support, particularly in load-bearing areas.
Utilize Proper Installation Techniques
Correct installation of studs is crucial for achieving maximum stability. Ensure that studs are not only evenly spaced but also securely anchored to the floor and ceiling. Using wood glue along with screws instead of only nails can enhance the strength of the connections. Furthermore, avoid cutting corners by ensuring that any modifications or renovations maintain or improve the original stud layout rather than compromising it.
Monitor and Maintain Regularly
Lastly, adopt a routine maintenance schedule that includes checking for signs of wear and tear, such as crumbling drywall or visible bowing of walls. Keeping an eye on potential issues and addressing them promptly-like touching up any gaps with caulk or sealant-can prolong the life of your trailer home’s structure. Building a solid framework of regular checks and using sturdy materials ensures your home is not only livable but also resilient against nature’s elements.
Embracing these expert tips can significantly enhance the stability of your trailer home, making it a safer and more comfortable place to live.
When to Consult a Professional for Structural Concerns
It’s critical to know when to seek professional help regarding structural concerns in your trailer home, as missteps can lead to significant safety risks and costly repairs. If you notice any signs of structural issues, such as cracks in walls, misaligned door frames, or persistent drafts, it’s time to consult a structural engineer or a contractor experienced with mobile homes. These professionals can assess your situation accurately and determine if your stud spacing is inadequate or if there are underlying issues that require immediate attention.
Another indicator for professional consultation is the age of your trailer home. Older models may not meet current building codes, potentially compromising safety. A professional can update and reinforce the structure with modern materials and techniques, which is especially important if you’re considering renovations or adding weight to the existing framework with new appliances or fixtures.
When planning any significant alterations, such as removing interior walls or adding new ones, it’s advisable to get a professional opinion. They can provide insights on the load-bearing aspects of your home and ensure that modifications do not undermine the overall integrity. It’s vital to approach these projects with a clear understanding of how changes can affect load distribution and structural support.
In summary, if you encounter any irregularities or plan to modify your mobile home in significant ways, don’t hesitate to reach out to professionals. They provide crucial insights that can safeguard your investment and enhance your living environment, ensuring your home remains a comfortable and secure space.
In Retrospect
Understanding the stud spacing in a trailer home is crucial for maintaining the integrity of your space and planning any renovations. With proper knowledge of this aspect, you can confidently tackle projects, whether it’s reinforcing structures or hanging fixtures. Don’t hesitate to dive deeper into our resources on basic maintenance tasks and simple renovation projects in trailer and mobile home living.
Ready to enhance your living experience? Explore our guides on essential home care techniques and financing options. Join our community by signing up for our newsletter to receive updates on the latest housing tips and tricks. If you have questions or insights, feel free to leave a comment below and connect with fellow trailer home enthusiasts. Your journey starts now-let’s make your trailer home the best it can be!